Monday, December 6, 2010

Whole Wheat Cinnamon Raisin Bread

Do you ever walk down the bread aisle and glance at the Pepperidge Farm Cinnamon Raisin Swirl Bread and think "Wow, that looks wonderful, but I don't need it" and then with a heavy sigh you pick up your regular plain old sandwich bread?

Well, I used to do that alot, and so when I saw a recipe in PR's Whole Grain Bread book for Whole Wheat Cinnamon Raisin Bread, I knew I had to try it.  Peter's method in this book is to make the breads usually over the span of two days.  On the first day, I made my soaker and my biga in separate bowls.  The soaker, which had the raisins in it, sat on the counter overnight.  The biga had 1/4 tsp yeast (but no salt to inhibit the yeast) in it and stayed in the refrigerator overnight. 

Here are my biga and soaker the next day ready to do their thing:
On the day of baking I divided both the biga and the soaker into twelve pieces each and tossed them together in the bowl of my KA mixer and then added the remaining ingredients for the bread.  Here are my biga and soaker all chopped into pieces in the bowl of my KA mixer.  I used my brand new OXO pastry scraper to do the chopping.  It worked wonderfully and I didn't cut any fingers off :)
I've made cinnamon rolls once before, but I haven't had much other experience rolling up doughs with filling in them.  I was spreading the cinnamon sugar mixture over the rolled out dough, taking it all the way to the edge, because the book didn't say not to.  I had a funny feeling though, that something wasn't right.

I rolled up the dough to place it in my 9x5 loaf pan, and when I went to transfer it, a shower of cinnamon sugar fell out all over my silicon mat.  I looked under the log of dough and the seam had  flopped open.  I looked again more closely at the picture in the book and it did look like they hadn't taken the cinnamon sugar all the way to the edge on one side.  Next time I make this I'll leave an inch or two border on one long side.  I managed to somehow squish the seam closed and get the rolled up log of dough into the pan. 

It said to cover loosely with plastic wrap and let rise at room temperature for 45 to 60 minutes, but I had almost no rise whatsoever after 1 hour.  So I preheated the oven to 170 degrees for five minutes, then turned the oven off and placed the pan of dough into it to see if some extra warmth might help.  I needed a few groceries for supper so I took off to the grocery store and was back in 45 min to an hour.  The loaf had STILL not crested the top of the pan.  I was really worried about the fate of my cinnamon raisin bread now.  I took the pan out, preheated the oven to 400 and held my breath as I slid the pan into the oven to bake.  Boy did it smell good baking!!!  Thankfully it had a nice oven spring and it rose maybe an inch or so above the rim of the pan after it had baked about 20 minutes.  The total time in the oven to reach the 195 degree internal temperature was the full 60 minutes plus maybe a few extra.

I transferred my loaf to a cooling rack and had to smell that cinnamony goodness for the next two hours as I waited to cut into it.
At first I was slightly disappointed when I tasted it, because it wasn't as soft and as sweet as the Pepperidge Farm bread.  As I ate more though, I started to appreciate the 100%  whole wheat flavor and stopped trying to compare it to something that's not whole wheat.  My bread was dense and a little dry and maybe I do need to work on my kneading skills, since I'm having trouble with the dough passing the windowpane test, but I still really like this bread. It just needs maybe an additional 1/2 cup of raisins added to the soaker next time.

My husband, who isn't a real big fan of 100 % whole wheat breads, except for a very select few at the supermarket, didn't like this bread as well, but he still said it wasn't bad toasted with a little butter and a sprinkling of cinnamon-sugar. 

Thursday, November 18, 2010

Pistachio Twist and Pinwheels (23rd Bread Braid)

The assignment for this, our 23rd bread braid, was to make pumpkin pie brioche and use it to create a pistachio twist and pinwheels.  I decided to only make half the recipe and make a smaller pistachio twist and only 6 pinwheels since it's just my husband and I and we just can't eat, nor do we need to eat, all that bread.  I wanted to try to improve the texture of the pumpkin brioche, so I tried leaving out the vital wheat gluten all together, but that didn't seem to help at all.  Instead of buying rose or orange blossom water for the filling,  I used 3-4 drops of fiori di sicilia, an oil I got from King Arthur Flour, that's good to use when making panettone. 
Here is my dough all ready to roll up:

I couldn't really spread the filling onto the dough so I just used my fingers to place it evenly over the dough and then smoothed it a little with the back of a tablespoon.  I wasn't sure I understood quite how to twist this thing after I rolled it up, but here's my interpretation of a twist tie twist:


 Unfortunately, my twist also erupted in the oven and didn't
look so pretty so I didn't take a picture of it.  I think I should've
now though, cause it would've been funny to look back on it.
The twist tasted OK, but the pumpkin brioche dough is not
my favorite.  It's kind of dry, cake-like and doesn't have much taste
at all unless you at least double the spices, which I didn't do this time,
because I didn't want to overpower the other flavors in the breads.

The pinwheels were fun to make.  I felt like it was a craft project, which I love to do, and so I was carefully trying to make them look pretty.  I could not figure out what preserves went with pumpkin, so I finally just ended up choosing cherry preserves, which I will use in a ham glaze around Christmas time.  Here's my pinwheel process:


I couldn't fit 2 tsp of cream cheese filling and preserves in the center of those pinwheels without ending up with quite a mess, so I used no more than a teaspoon of each in the centers.  The pinwheels tasted OK too, but the lemon flavor didn't go so well with cherry.  I think an almond flavoring would've been better.  My husband didn't really care for these as he is not a cream cheese fan so I had to eat 5 of them.
With the rest of the pumpkin from my 15 oz can, I was able to create a batch of pumpkin spice bagels and half the recipe for harvest pumpkin scones (with cinnamon chips).  Those bagels and scones went really well with some piping hot pumpkin spice coffee from Fresh Market.

I also made a loaf of 100% Whole Wheat Sandwich Bread from Reinhart's book "Whole Grain Breads" last week.  I didn't think to take a picture of it, but it was awesome sandwich bread. 


Tuesday, November 2, 2010

Tabbouleh Bread (22nd Bread Braid) & Wild Rice and Onion Bread

I've never had Tabbouleh Salad before, but always wondered what it tastes like.  I knew it had lots of parsley in it being that I stare at it everytime I'm shopping at Whole Foods and walk by the salad bar.  The farthest I've gotten with bulgur is using it in a meatloaf so trying it in bread sounded interesting!  I'm not sure if this helps with knowing the correct pronunciation, but Tabbouleh is also known as tabouleh or tab(b)ouli according to Wikipedia.  It is a Levantine salad typically containing bulgur, parsley, mint, tomato, and spring onion, seasoned with lemon juice and olive oil. 

 I decided to keep it simple for my first loaf and just made an oval.  Here it is proofing on my pizza pan covered with saran wrap (the only change I made was to use two cloves of garlic for half the recipe):
The loaf browned nicely and smelled good as it baked and it tasted pretty good too, but I was disappointed that neither the garlic or the parsley taste came thru much at all.  I even had trouble discerning the lemon at times.  The bread was good though.  I'd like to make it again using Michelle's version over at Big Black Dogs and trying to incorporate maybe another ingredient you typically find in the salad.  Here is my finished loaf:
With the remainder of my half recipe dough I made pita pockets to stuff tuna salad into.   I managed to make the pita pockets, but they didn't quite have the texture and thickness of pita bread I've had before.  Next time I'll try a dough recipe specifically tailored to making pita pockets.  I rolled the dough into 7 in. rounds, then baked them ~ 10 min. at 400 degrees.  Here's one of my prepared pockets with some chips and apples gotten from a local orchard:
  The second assigned bread for the 22nd bread braid was Turkish Pear Coffee Bread.  It just didn't sound very appealing and I still don't have any ground cardamom, which the recipe calls for.  So I didn't make this bread (yet), but I might try it over the holidays if I get some ground cardamom next time I'm at Penzey's.

Instead of the Pear Coffee Bread, I tried one the recipes from "Peter Reinhart's Artisan Breads Every Day" book.  I hadn't had a chance to try one of his with all the other breads I've been baking.  The one I wanted to try first was the Wild Rice and Onion Bread on page 113.  I really like wild rice and since I had all the ingredients for the bread and Peter said it was the second most popular bread at Brother Juniper's Bakery, I had to try it.  It smelled good even before I baked it, with the dried minced onion in the dough.  I added a pinch of dried thyme and some fresh minced rosemary to the dough also.  He says that at Thanksgiving they added parsley, sage, rosemary, thyme, garlic powder, and black pepper to the bread and it became a wonderful bread to use in making stuffing.  Here's my finished loaf:
This bread tasted wonderful!!! A great addition to our Beef Barley Stew we had for dinner that night.

Friday, October 15, 2010

Pizza on the Grill, Garlic Studded Baguette, & Grissini (21st Bread Braid)

The baking agenda for this bread braid was a little less labor intensive than the previous one, which is good because I had a bad cold.  I did get to go to a King Arthur Flour Baking Demonstration just before I caught my cold though.  It was in Columbus OH and I persuaded my husband, mom and dad to go with me, which was good because my Dad won me a bag of KAF Organic AP flour.  Now I know what Frank and Elizabeth look like and even got to ask Elizabeth a baking question in person!!

The first task of this braid was to make pizza on the grill.  For my dough I used the Master Recipe from the HBin5 book.  The only changes I made was to add 2-3 tsp of brown sugar and 1 Tbsp of olive oil to the other ingredients in the dough.

I chose to make two individual pizzas for dinner.  Individual sizes gives us more variety for dinner and the littler pizzas are easier to handle.  I rolled my dough on parchment paper and then this is what my husband uses to hold onto when he flips it onto the grill, paper side up.  He peels the paper off right away.  If I had a pizza peel, which I do want for Christmas, I would have tried flipping the dough onto the grill the way Alton Brown does in his "Flat is Beautiful" episode.  It looks so easy the way he does it, but I'll bet he's had lots of practice and his pizza probably doesn't always land so neat and centered on his grill grates.

My husband and I made a pepperoni pizza with black olives, diced red pepper & mozzarella cheese and a Hawaiian pizza with sliced green onions, ham, and pineapple tidbits.  For the sauce I just made an herbed pizza sauce , a standby sauce that I make alot, because I didn't have the time or ingredients to try another sauce.  It is a wonderfully simple, tasty sauce.


Next up was the garlic studded baguette.  My baguette was kind of small, but I did use the half pound recommended size piece of dough.  I was concerned that the garlic cloves would not be "spreadable" once the baguette was cooked so I thought it might help if I drizzled just a teeny bit of olive oil onto each piece of garlic.  The garlic still was not spreadable when the baguette was cooked.  My cloves also tried to pop out of the baguette when the loaf was cooking, so I reached in and pushed them back down into the bread with the handle of a knife.  Does anyone know what is required to get the cloves to be spreadable?


The Grissini were very easy to make.  I should've started out with my half sheet pan, but I didn't.  I used a pan that was too small and we had to make the grissini in two batches.  The first batch we brushed with olive oil and sprinkled with garlic powder, kosher salt, and fresh minced rosemary.  Then we cut with a pizza cutter.  The second batch we sprinkled with garlic powder, kosher salt and fresh grated parmesan since we'd run out of the fresh rosemary.


The grissini were very tasty and we gobbled them all up just before they started to cool off.  They went well with the Penne Sausage Bake we had for dinner.

Be sure and check out what everyone else did for this bread braid at Big Black Dogs.

Also, I just wanted share about the apple pie I made yesterday.  It's the one they made at the King Arthur Flour noon baking demonstration that I went to in Columbus.  If anyone likes to make apple pies and hasn't tried this recipe it is very worth it to try this one.  It has a very good filling!  Here's the link to their KAF Guaranteed Apple Pie.  Here's the pie I made:


Monday, October 4, 2010

Indian Spiced Doughnuts & Pear Tarte Tatin (20th Bread Braid)

I was a little nervous about using hot oil to fry doughnuts, since I've never deep fried anything before.  I've always wanted to try, especially after watching Alton Brown fry fish on Good Eats.  I love a good fish & chips!

Anyway, my doughnuts weren't Indian Spiced really, since I didn't use the ground cardamom in my spice mixture.  I didn't have any and it's just a little bit expensive.  I substituted a pinch of fresh ground nutmeg.

I did my frying in my largest pan, which is an 8-qt stockpot and I filled it about half full with peanut oil.  I read this week, though, in my King Arthur Whole Grain Baking cookbook that you only need a couple inches of oil to fry doughnuts.  I didn't quite fry mine for a whole minute on each side.  I had a tough time keeping my doughnuts round between lifting them off the rubber mat and sliding them into the oil; some were quite oblong in shape.  The doughnuts tasted perfectly wonderful hot and fresh, but they didn't taste nearly as good the next day, which was sad.  We did give some away, but we had to eat the bulk of them ourselves.  Here they are:
    These were also good with
   a tall glass of cold milk!

The pear tarte tatin was the last part of this bread braid.  I didn't realize when I made the pumpkin pie brioche, that it needed to be used in 5 days, so I was in a little bit of a hurry at the end, when I realized this and I still hadn't bought my pears.  I picked up 3 large Bartlett pears, but I probably should have picked ones that weren't quite so ripe.  I only cooked them maybe 10-15 minutes in the butter/sugar sauce.  I was concerned that the pears would get so soft that they would be mush and be hard to transfer to my deep dish stoneware baker.  Here are my pears cooking in the skillet:

I omitted the cinnamon stick, because I didn't have one, and sprinkled some cinnamon over the pears as they cooked.  After simmering them and turning to coat both sides of the pear slices, I tranferred the pear slices to my stoneware dish.  I layed my pear slices on their side since I think this gives a prettier presentation when the finished tarte is turned out onto the plate.  I halved my pear quarters so my slices are also thinner.
My dough was a perfect circle after rolling it out and with minimal effort I slid it onto my pears in the stoneware baker. It was perfectly centered, just needing tucked in.  What luck!!!

We served ours with a bit of frozen yogurt and drizzled with some of the leftover caramel sauces from the simmering pears that I had saved and reheated.  What a nice treat after dinner!!
Make sure you go visit Big Black Dogs to see what the others did for this HBin5 Bread Braid!

Thursday, September 30, 2010

Sticky Buns made with Pumpkin Pie Brioche (20th Bread Braid)

Wow! This week I had an awesome fun time working with the Pumpkin Pie Brioche to create 3 delectable desserts. 

I'm so glad we had cooler weather this week and last.  It was so much more enjoyable in the kitchen.  I chose to make the Pumpkin Pie Brioche dough for these recipes for two reasons.  One, it looked tastier and, two, I'd never roasted a pie pumpkin before and was eager to do it for the first time. 

Here is my pie pumpkin ready to go into the oven to be roasted:  I scooped the seeds out before I roasted it.

 After I roasted the pumpkin, I peeled off the skin, roughly chopped it, put it into the food processor for a spin, and then into a cheesecloth lined colander to drain for a few hours:


I got almost exactly my 1 3/4 cups pumpkin puree from a 3.15 lb pumpkin.  We got a good bit of seeds from this little pumpkin and we found them quite tasty after roasting for an hour.  We tossed the seeds with melted butter, salt, Worcestershire Sauce, sugar, garlic powder & a pinch of cayenne.
The dough went together quite easily.  I did make a few modifications as I went along.  Usually, brioche recipes call for egg yolks and not the whites.  This time I used just the yolk for only 1 of my 4 required eggs, but in the future I might try tweaking/playing with the recipe further.  My other modifications were:
+ 1 Tbsp sugar
+ 2 tsp Madagascar Vanilla (-some of the honey)
+ 1.5 times the amount of spices
- 1/4 cup of water

I made the dough on Friday and on Saturday my husband and I dove into the Sticky Bun project.  I was really nervous as I had never made any kind of sticky bun before.  My hubby was just hungry and said "Let's get started!!!"

Dean doesn't like sticky buns that are really sticky, nor excessively sweet so we went to kingarthurflour.com/recipes/ridiculously-easy-no-knead-sticky-buns-recipe and used their recipe for the topping that went into our 9" cake pan.  We omitted the sticky bun sugar (as we didn't have any) and only sparingly sprinkled the pan with pecan pieces.  (Dean's not a fan of nuts in his desserts.)  For the filling we combined 2/3 cups sugar, 1 Tbsp cinnamon, and maybe a 1/2 tsp of orange zest.  We were going to sprinkle some raisins over the dough before we rolled it up, but we forgot.  Before we sprinkled our cinnamon/sugar mixture onto the dough we tried spreading some honey on the dough.  It was kind of tough to spread, but we got some on.  Here is our dough ready to be rolled:

Here is our before and after (rising for an hour) picture for our assembled pan of buns:
I was up and down the stairs all during the "rising" hour checking on the progress of the buns.  I was so excited that they were puffing up, expanding out until they touched, and then pressing up against one another.  Dean wasn't quite so excited as I was, just still hungry.
Tucker was just bored,
but loving the smells:
Finally, the anticipated moment when it's time to eat and share with neighbors these Pumpkin Pie Brioche sticky buns that were just amazing!!!  (I wish I could install a smell-a-vision feature here)
Make sure you visit Big Black Dogs to take a peek at what others have done with their Honey Caramel Sticky Nut Buns.

Monday, September 20, 2010

Maple Oatmeal & Quinoa Bread (19th Bread Braid)

This biweekly part of our bread journey took us to creating 100% Whole Grain Maple Oatmeal Bread and Quinoa Bread.  I have to say that I was quite excited when I saw that the next bread we needed to make was a sweet bread.  I love crusty type, hearth breads, but I was definitely in the mood for some sweetness.  I had been frustrated with previous recipes' substantially "wet" dough so I don't know why I wasn't more careful here.  I guess my brain was slightly turned off in my zeal to quickly make some sweet bread.  I dumped all the ingredients into my bucket, or rather my KA mixer, and after a few minutes of mixing I realized that I should have held back water.  My dough mixture was more like batter than dough, but I put it into the fridge after it had risen sufficiently and thought that maybe the flour would absorb some of that water and it would be less runny.  I was wrong.  The dough was difficult to work with.  I used flour, flour and more flour, but no matter how much I used the dough stuck quite readily to everything.  I couldn't shape it very well at all and just barely managed to fling it into the loaf pan after dough droppings fell on the floor and all over the front of me.  I was not happy :(  Oh well, this is a learning experience.  After about thirty minutes of baking, I think, I detected an overdone smell, looked in the window and the loaf looked much too brown.  Like many of the King Arthur loaf recipes that I make, I think this loaf needs to be tented with aluminum foil after the first 20 minutes of baking.  I quickly slapped a foil tent over my loaf, but it had already gotten a little too brown around the edges as you can see from my picture.
The loaf tasted good though, and I probably cut into it sooner than I should have, to have a slice slathered with homemade strawberry jam.  I plan on trying the loaf again when I have time and definitely leaving out much water.  I still have to say though, that my favorite maple flavored oatmeal bread is the "Vermont Oatmeal Maple-Honey Bread" recipe in The King Arthur Flour Baker's Companion cookbook.

I was quite perplexed with the Quinoa Bread.  I really thought it odd that the recipe said to use uncooked quinoa.  Quinoa is a grain that's native to South America and is very high in protein.  When it is cooked, it becomes translucent and is soft and nutty tasting, but using it uncooked in a bread, I guessed it would be hard and crunchy.  I had just made a loaf a few weeks previous using 7 grain cereal, and I did not like it because of the crunchy bite of the various grains.  I was so wanting to cook that quinoa before adding it to the flour, yeast, and salt, but I decided not to since the recipe as written said uncooked.  I did, however, add two extra ingredients to the recipe.  I've been reading Peter Reinhart's book "Artisan Breads Every Day" and I was comparing the Quinoa Bread recipe to his recipe for 100% Whole Wheat Hearth Bread.  I decided to incorporate the brown sugar and oil from his hearth bread recipe into our quinoa bread recipe to ensure that the bread had good flavor.  I put 1 Tbsp brown sugar and 1 Tbsp canola oil into my half recipe of Quinoa Bread.  For this recipe I was determined to have the proper consistency dough, so I weighed all my ingredients on my Salter scale and I only added 1 cup of water to the other ingredients to start with.  It turned out that for a half recipe of the Quinoa bread I left out 3/8 cups of the water called for. 

I decided to shape mine into baguettes like several others in the group.  I'm fascinated by this shape and that I can actually do it myself at home.  The only other baguette I'd made was with the Rosemary Flax bread from the HBin5 book.  Here is my first baguette:
The dough was wonderfully easy to work with, and I got a very good rise from the dough after shaping the baguette and leaving it to rest on the parchment before going into the oven.
I sliced the baguette and we topped the slices with some homemade pesto, ricotta cheese and garlic the first night and with just pesto the next night. 

I have to say it was quite good, even though ever so slightly crunchy from the little seeds.  I encourage you to visit the blogs of others in the group by going to Big Black Dogs, to see their wonderful creations!! 

Tuesday, September 7, 2010

Zucchini & Msemmen Flatbreads (18th Bread Braid)

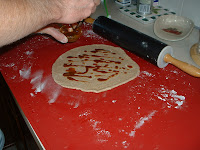
Well, this will be my first post to this blog or any blog for that matter.  This week my adventure took me to the 18th Bread Braid of the HBin5 Bread Baking group.  For this braid the challenge was to make a Zucchini Flatbread and an Algerian Flatbread called Msemmen, using the recipe for 100% Whole Wheat Bread, Plain and Simple from page 79 of the book.  Since I made the Msemmen first I will start there.  As discovered by others in the group, the amount of olive oil to use in combination with the spices was a little excessive.  I cut the spice amounts in half and added ~ 1 Tbsp EVOO to them.  Then I drizzled (sparingly) the oil mixture onto the rolled out dough round.   I found that if you drizzle even just a little
too much,  when you go to roll the dough up into the log, the oil
mixture piles up or pools at the end and starts to leak out onto whatever
surface you're working on.  I rolled my 5 oz dough balls out into ~ 7 in. circles.  There's no way you'd get it rolled out to 12 in. as suggested in the book.  My rolled up coil did not want to stay coiled, but I just left it alone until I rolled it out flat to 1/8 inch thickness. 


I only put ~ 1 Tbsp olive oil in my
skillet to cook my Msemmen in.  I didn't see the need for any more than that.  My Msemmen cooked up really well in the skillet.  The Msemmen I made the first day was not nearly as browned, but the Msemmen I made for my husband and I was nicely browned as my husband encouraged me to cook the full 5 min. on the second side.   The nicely browned Msemmen had a better texture and had some crunch to it.  I made some
Lemon Garlic Hummus  to spread on the Msemmen.  The Morrocan version of Msemmen is served with honey, but since we had made the spicier Algerian version,  hummus seemed an appropriate spread for it.     I also considered serving a chutney with it, as someone else I read about online had done when he made Msemmen.  He had used an apple cranberry chutney, but since the jars were $5 something at the store, I reconsidered and made the hummus since I had all the ingredients.  Here is my sous chef waiting on his dinner, which is late at this point, and our finished Msemmen.


Now on to the Zucchini Flatbread.  Since I had made the Msemmen twice using two 5 oz pieces of dough, I only had ~ 20 oz. of dough left.  When my husband asked "What kind of sauce?" and "NO Meat?" after I told him we were having zucchini flatbread for dinner, I knew I had better make two 'pizza's'.  So we made two flatbreads, each using ~10 oz of the dough.  Since we were on an adventure and Guff had grilled his flatbread, I decided we'd try grilling one of the pizza's.  (We'd never grilled pizza before)
Dean grilled the pepperoni pizza outside, while I made the zucchini flatbread in the oven.

I only used ~3/4 of a medium zucchini which I don't think was enough, but I wanted the rest of the zucchini for kabobs the next night.  I also added a clove of minced garlic to the skillet and some crushed red pepper flakes.  Here's the topped "pizza" before it goes into the oven:


  I thought Guff had a good idea using corn, so I thawed some frozen corn to put on mine.  Oh, and I also brushed the crust edges with some EVOO for browning.  Here's the pizza my husband did outside on the grill.  Success!!!!! We were very proud of ourselves for not flipping the pizza on the ground or burning it to black chardom.

The pizza's were ready to be eaten :)  We were sooooo hungry!


Dean was very good 
and ate 3 pieces of zucchini
flatbread, so I gave him my
share of the pepperoni
pizza that was left.  The
sous chef got crust scraps.
Tucker was very happy
with his share of our
adventure!!

If you want to see the beautiful creations of others who baked the Zucchini Flatbread and Msemmen, then I encourage you to visit Big Black Dogs and take a look!!